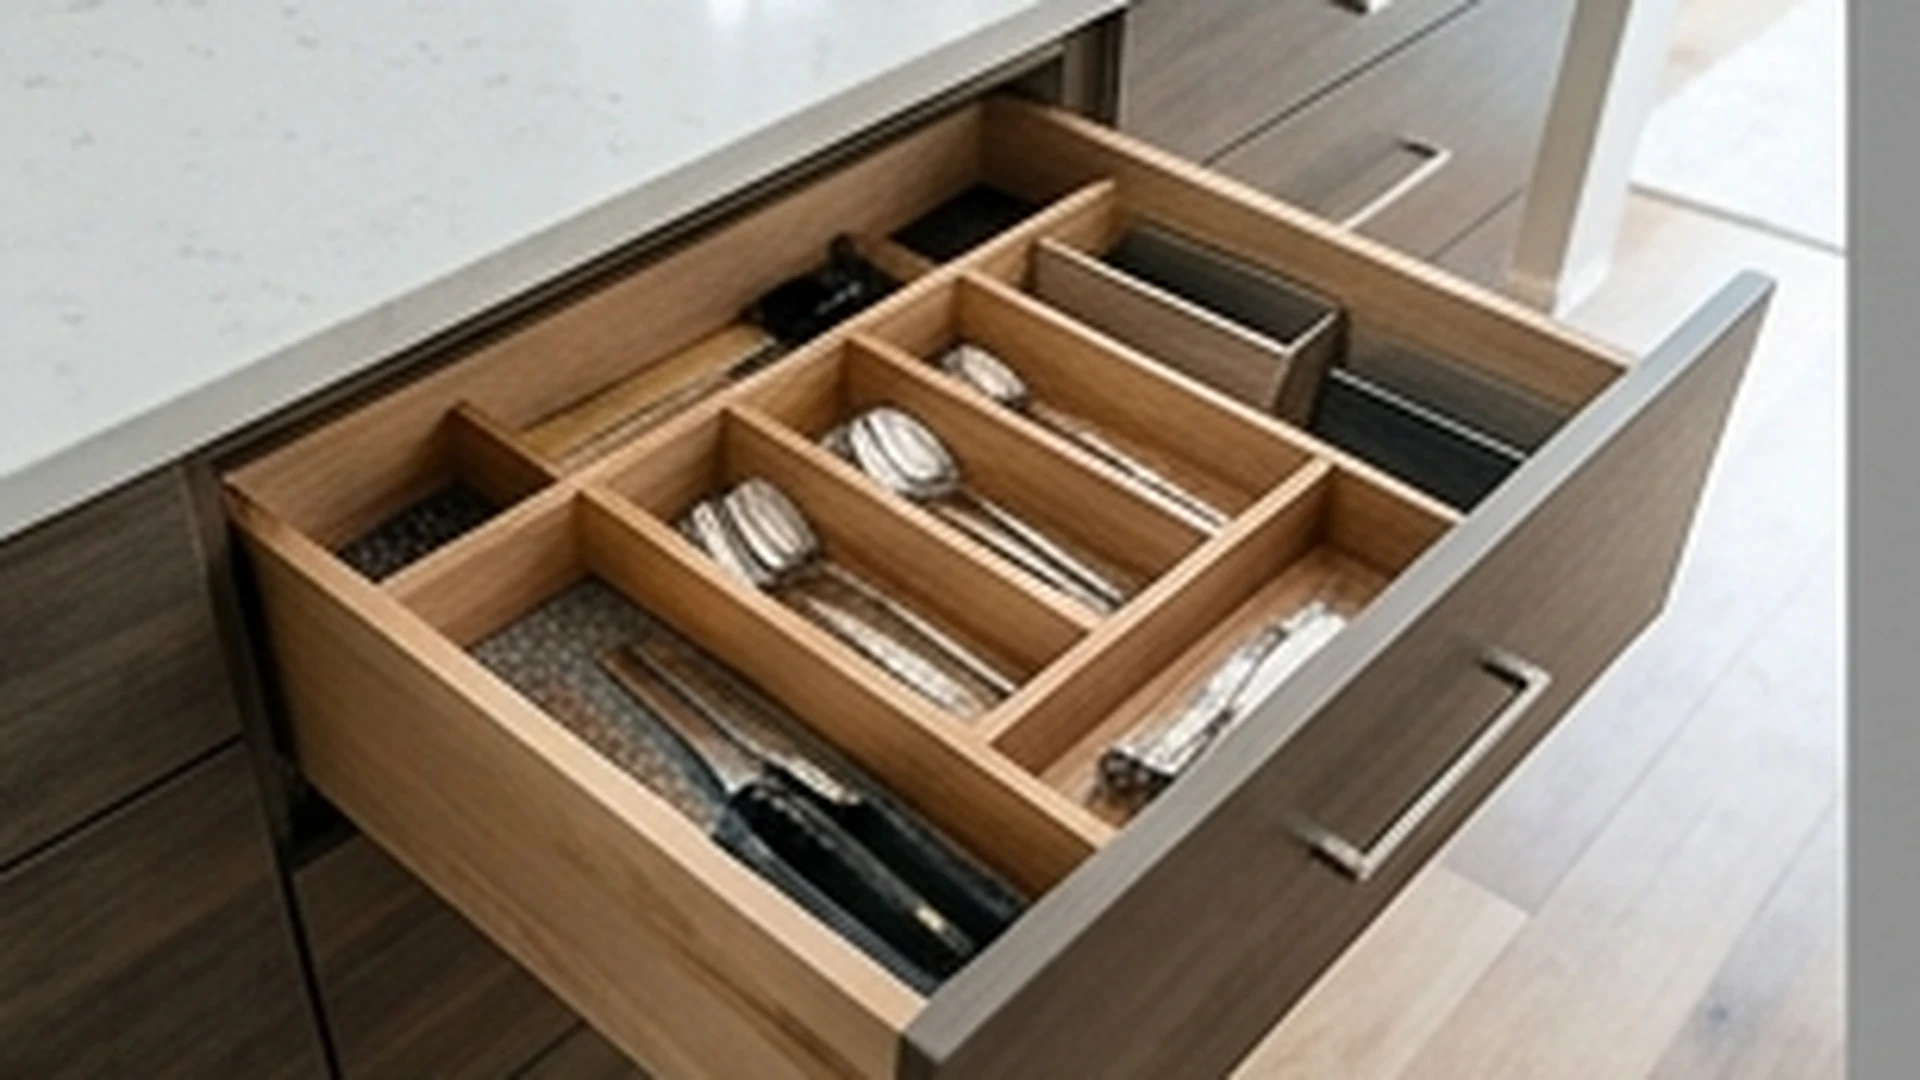
Kitchen cabinet installation in Frederick

Cabinets & Storage

Kitchen Cabinet Installation in Frederick, MD

Cabinet installation done in the correct sequence — wall cabinets before base cabinets, shimmed level and plumb, secured to studs, with countertop template taken after the boxes are set. The sequence matters.

01Wall Cabinets Before Base Cabinets

Upper wall cabinets install before base cabinets so the installer has full floor access and isn't working over base cabinet fronts. Installing base cabinets first risks damaging the finish when the installer kneels, sets tools, or bumps the uppers during hanging. The sequence protects the work.

02Level and Plumb in an Unlevel Room

Residential kitchen floors and walls are rarely perfectly level or plumb. Cabinets need to be level and plumb even when the wall isn't. Shims set the cabinet correctly; scribes or filler strips handle the gap between cabinet and wall. Skipping this step produces cabinet doors that won't stay open and drawers that slide shut on their own.

03Stud Location Before Installation

Cabinets attach to the wall through the cabinet back into studs. Attaching to drywall without hitting studs produces cabinets that pull away from the wall — particularly upper cabinets loaded with dishes. We locate and mark every stud in the installation area before hanging begins.

Frederick Cabinet Installation

What Kitchen Cabinet Installation Actually Involves

Cabinet installation is a precision task that builds on accurate measurements, a level reference line, and correct sequencing. Done right, cabinet doors align across all upper and lower runs, drawers operate smoothly, and the overall installation looks built-in rather than placed. Done wrong — even with quality cabinets — misalignment, racking, and poorly fitting doors make the kitchen look and feel cheap. The installation quality matters as much as the cabinet quality.

The Cabinet Installation Process

Installation begins with snapping a level line on the wall at the top of the base cabinet height (typically 34.5 inches from the highest floor point). This line serves as the reference for all base cabinet installation. A second level line is snapped for the bottom of wall cabinets. All cabinets install to these reference lines regardless of where the floor or ceiling dips.

Wall cabinets hang first. Adjacent cabinets are clamped together at the face frame or stile, aligned flush, and then screwed together through the cabinet sides before being attached to the wall. Base cabinets install next, shimmed to the level line and connected to each other the same way. Filler strips at walls are cut and scribed after all cabinets are installed. The countertop template is taken after the entire base cabinet run is level, plumb, and secured.

Cabinet Styles We Install

  • Stock cabinets (builder-grade, standard dimensions)
  • Semi-custom cabinets (extended size ranges, more finish options)
  • Full custom (made-to-measure, any specification)
  • Face-frame and frameless (European-style) construction

What a Quality Installation Looks Like

  • All doors aligned — reveals consistent across all door edges
  • Drawers operate smoothly and hold position when stopped
  • Face frames flush at all joints where cabinets meet
  • No visible shims or gaps at walls (filled with scribe molding)
Installation Day Sequence

How We Install Kitchen Cabinets

1

Prep and Layout

Level lines snapped. Stud locations marked. All cabinets staged and confirmed against the layout drawing before any cabinet goes on the wall.

2

Wall Cabinets

Upper cabinets hung on reference line. Adjacent units clamped, aligned, and joined. Hardware adjusted for consistent reveals.

3

Base Cabinets

Base cabinets set to level line with shims. Connected to each other. Toe kicks cut and attached. Scribe molding installed at walls.

4

Template and Punch List

Countertop template taken immediately after base installation. Hardware installed (or staged for after countertops). Final alignment check and touch-ups.

Soft-Close Hardware

Soft-close hinges and drawer slides are the standard for most cabinet installations today. They prevent the cabinet box from taking impact damage from slamming doors and drawers. Soft-close hinges can be retrofitted onto most existing cabinets if the box is sound. On new installations, we confirm soft-close hardware is included in the cabinet order before installation day — retrofitting at installation is time-consuming and sometimes requires drilling new mounting holes.

Dealing with Out-of-Square Rooms

Older Frederick homes frequently have walls and floors that are measurably out of square. A corner where two wall runs meet that's 91 degrees instead of 90 creates a visible gap at the inside corner between cabinet runs. The standard solutions — a filler strip, a scribed corner panel, or an angle cut on the cabinet face — each look different. We discuss the approach before installation so the homeowner knows what to expect at the corners.

Cabinet Delivery and Inspection

Cabinets should be inspected for damage immediately upon delivery, before the delivery driver leaves. Damage claims are much easier to process before the delivery is accepted than after. We recommend inspecting every box, door, and drawer front before signing off on the delivery. If damage is found, we document it and coordinate with the supplier for replacement parts or units before the installation date.

When Old Cabinets Need to Come Out First

If the project includes removing existing cabinets, demo typically takes one day for a standard kitchen. Older cabinets in pre-1970s homes are often face-nailed into plaster walls, which can damage the plaster during removal. We assess the wall condition during demo and repair any damage before new cabinets install. The plaster repair is scheduled so it has adequate drying time before cabinet installation begins.

Frederick Kitchen Cabinet Installation

Ready to Install New Kitchen Cabinets?

We'll review the layout, confirm the sequence, and give you a realistic installation estimate.

Request An Estimate

Cabinet Installation Questions

How long does kitchen cabinet installation take?

A standard kitchen cabinet installation for a 10-15 foot kitchen with upper and lower runs typically takes 1-3 days for the cabinet installation itself. Larger kitchens with islands, tall pantry units, and specialty cabinets can take 3-5 days. This is cabinet installation only — countertop templating happens after, and countertop fabrication and installation follow 1-3 weeks later.

Do the cabinets need to be on site before you can give an accurate estimate?

We can provide an estimate based on the cabinet layout and quantity from the drawings. Having the actual cabinets on site (or the confirmed manufacturer and model) lets us be more precise about installation complexity. Some cabinet lines are easier to install than others — heavy frameless cabinets, unusual heights, and specialty units each add time.

Can you install cabinets I purchased myself?

Yes. We install customer-supplied cabinets. The cabinets should be delivered to the site before installation day, and we ask to review the installation manual before scheduling. Some cabinet brands use non-standard mounting hardware or require specific tools. Knowing this in advance prevents delays on installation day.

Related Cabinet & Storage Services